
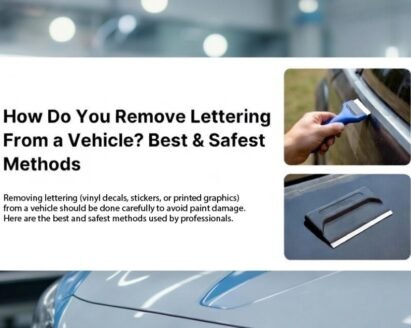
Vehicle lettering is excellent for visibility, but removing it the wrong way can permanently damage your paint. Whether you are selling or rebranding your car, if you have ever looked for the best way to remove the lettering from a vehicle, this guide is for you! We break down the safest and most proven methods that professionals trust to remove vehicle lettering.
Understanding Vehicle Lettering Types
Before you start, it’s important to identify what type of lettering or graphics is on your vehicle. Different materials age differently and require slightly different removal techniques:
- Cut Vinyl Lettering: Single-color adhesive letters applied directly to paint, commonly used for business names and contact details.
- Printed Vinyl Lettering: Full-color printed letters with adhesive backing, ideal for logos and detailed designs.
- Vinyl Decals: Pre-spaced graphics combining text and logos into one easy-to-apply piece.
- Partial Vehicle Wrap: Printed vinyl panels covering specific areas of a vehicle with integrated text and graphics.
- Full Vehicle Wrap: Complete vinyl coverage of the vehicle, incorporating all lettering into the design.
- Reflective Lettering: Specialized vinyl lettering designed to reflect light for nighttime visibility and safety.
Tools You'll Need for Safe Removal
You don’t need only professional tools to remove vehicle lettering safely. You can also use basic tools:
- Car wash soap and microfiber towels
- Hair dryer (preferred for beginners) or a heat gun
- Plastic scraper or old credit card (never use metal blades!)
- Rubbing alcohol or automotive adhesive remover (like Goo Gone Automotive)
- Rubber eraser wheel (for old or brittle vinyl)
- Light polish and wax for finishing
Method 1: The Heat-and-Peel Method (Safest & Most Common)
This is the most common method for removing lettering from a vehicle safely and effectively.
- Use a hair dryer to heat the vinyl. Keep it moving and do not heat one spot too much.
- Lift one corner of the lettering with your fingernail or a plastic card.
- Peel slowly at an angle; continue to apply light heat as necessary.
- In case the vinyl tears, reheat and continue carefully.
Heat relaxes the adhesive, making it possible for the vinyl to release without breaking apart or pulling the paint. This is ideal for newer vinyl and business decals.
Method 2: Adhesive Residue Removal
After removing vinyl lettering, sticky residue often remains. Here are safe options to remove it:
- Apply rubbing alcohol or specialized automotive adhesive remover to a microfiber cloth.
- Gently wipe the sticky areas. Avoid hard scrubbing motions, as this may scratch the paint or dull the clear coat.
- Quick tip: taking the time to let the chemical dissolve the adhesive is much safer than forcing it off.
Method 3: Eraser Wheel for Old or Stubborn Vinyl
The peeling method may not work well if the lettering is very old, cracked, or sun-damaged. A rubber eraser wheel (attached to a household drill) is an effective alternative:
- It gently rubs away vinyl and adhesive without hurting the clear coat.
- Requires steady, light movement to prevent heat buildup.
- This is common for fleet vehicles and work vans. Tip: Always test on a small hidden area before full use.
What Is "Ghosting" After Letter Removal?
Ghosting is a faint outline where lettering was removed. It happens because the surrounding paint faded from sun exposure, while the paint under the vinyl stayed protected. Severe cases may require a professional paint correction (polishing or buffing).
Aftercare: Protecting Your Vehicle's Paint
Finish with a quality car wax or paint sealant. This restores shine and protects the exposed paint from future fading. Removing custom vinyl lettering doesn't have to be rough. These methods are the best way to remove lettering when rebranding or restoring your car.
Rebranding your fleet?
Signs2Go can help with professional vehicle lettering removal and new branding installation. Contact us today!